Pasadena, California Installation case study
Hardwood Flooring Installation in Pasadena, CA: From Subfloor Preparation to Beautiful New Floors
A residential project documented from bare plywood and floor leveling to the finished dark wide-plank hardwood floor.
- Location
- Pasadena, CA
- Project
- Residential hardwood
- Subfloor
- Plywood
- Preparation
- Leveling where needed
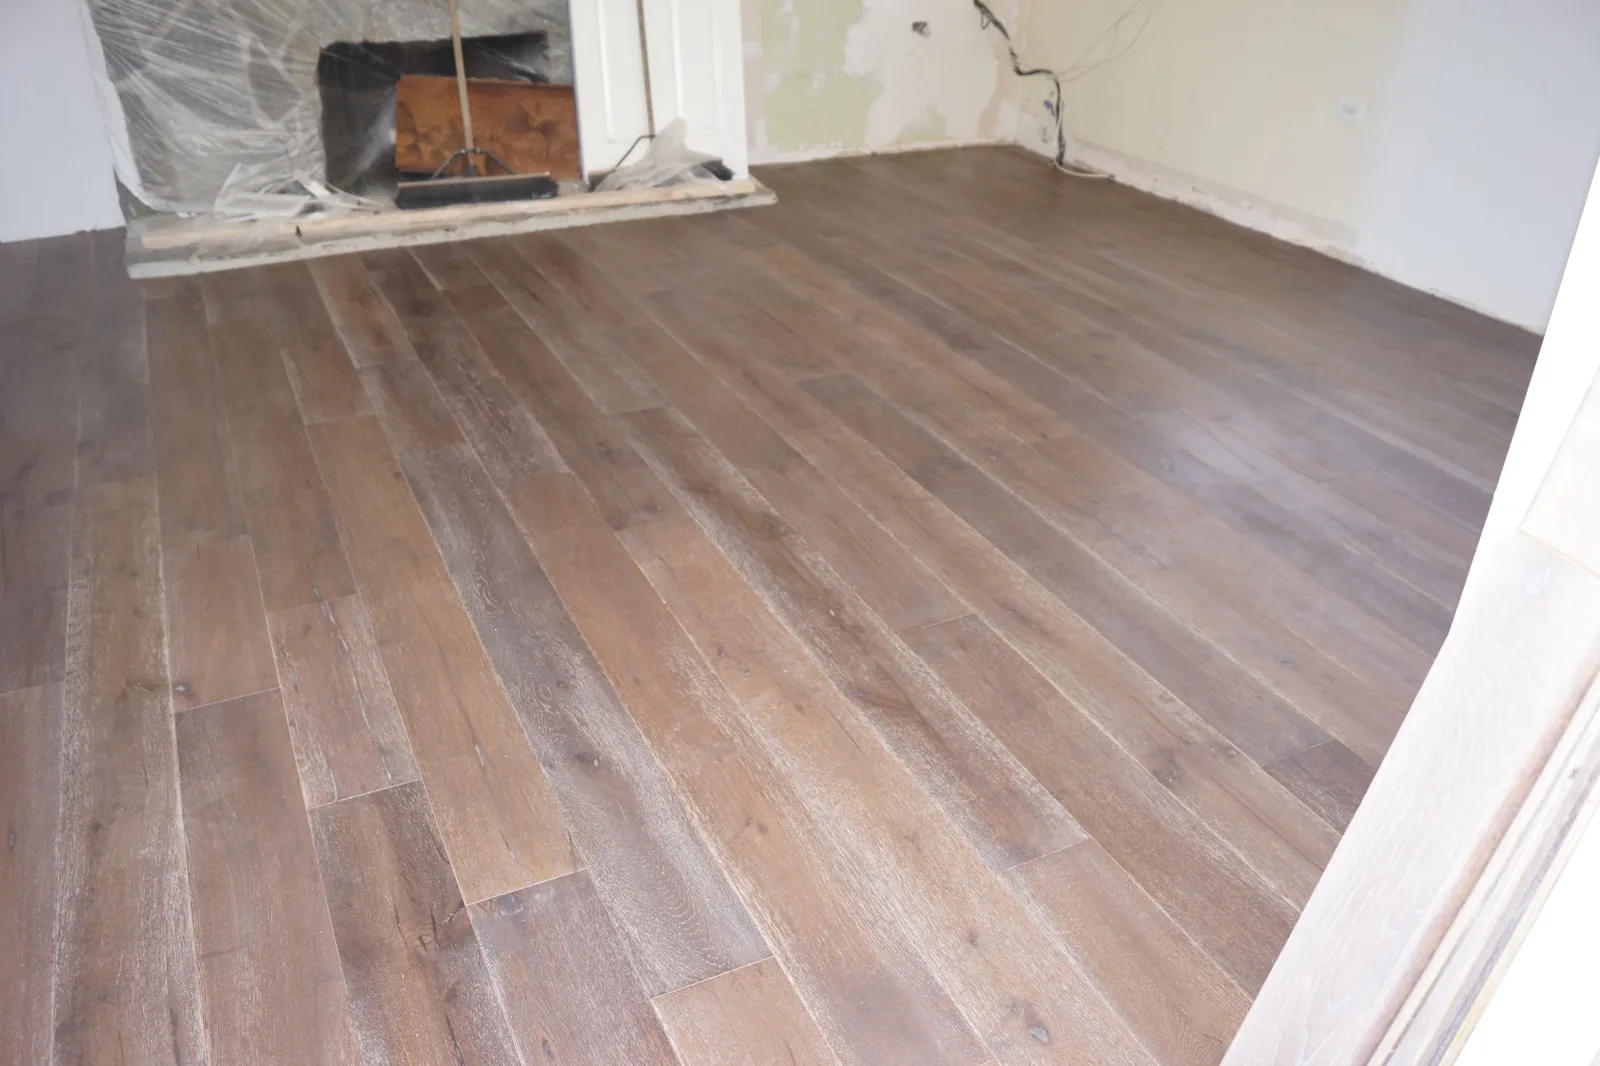
Beautiful hardwood floors start with what you never see. On this Pasadena project, our installation team worked through several stages before and during the hardwood installation: preparing the plywood subfloor, filling uneven areas with leveling compound where they needed it, staging the flooring, and then laying the new planks. Each stage affects how flat, solid and consistent the finished floor will be.
Uneven floors? Planning new hardwood in Pasadena?
By Los Angeles Hardwoods ·
Step 1: evaluating the existing subfloor
Before any hardwood is ordered or installed, the surface underneath has to be checked. That means looking at the subfloor's condition, finding loose or damaged areas, deciding what existing flooring has to come out, checking the plywood itself, and considering moisture. All of it is measured against the installation requirements of the specific flooring product.
An important distinction: flat is not the same as level. Level means horizontal, like a reading on a spirit level. Flat means the surface doesn't rise and dip over short distances. Hardwood manufacturers specify flatness tolerances, commonly around 3/16 inch within 10 feet or 1/8 inch within 6 feet, and some products are stricter. A floor doesn't need to be perfectly level to receive hardwood, but it does need to meet the flatness requirement of the product being installed.
Before installation
Step 2: preparing the plywood subfloor
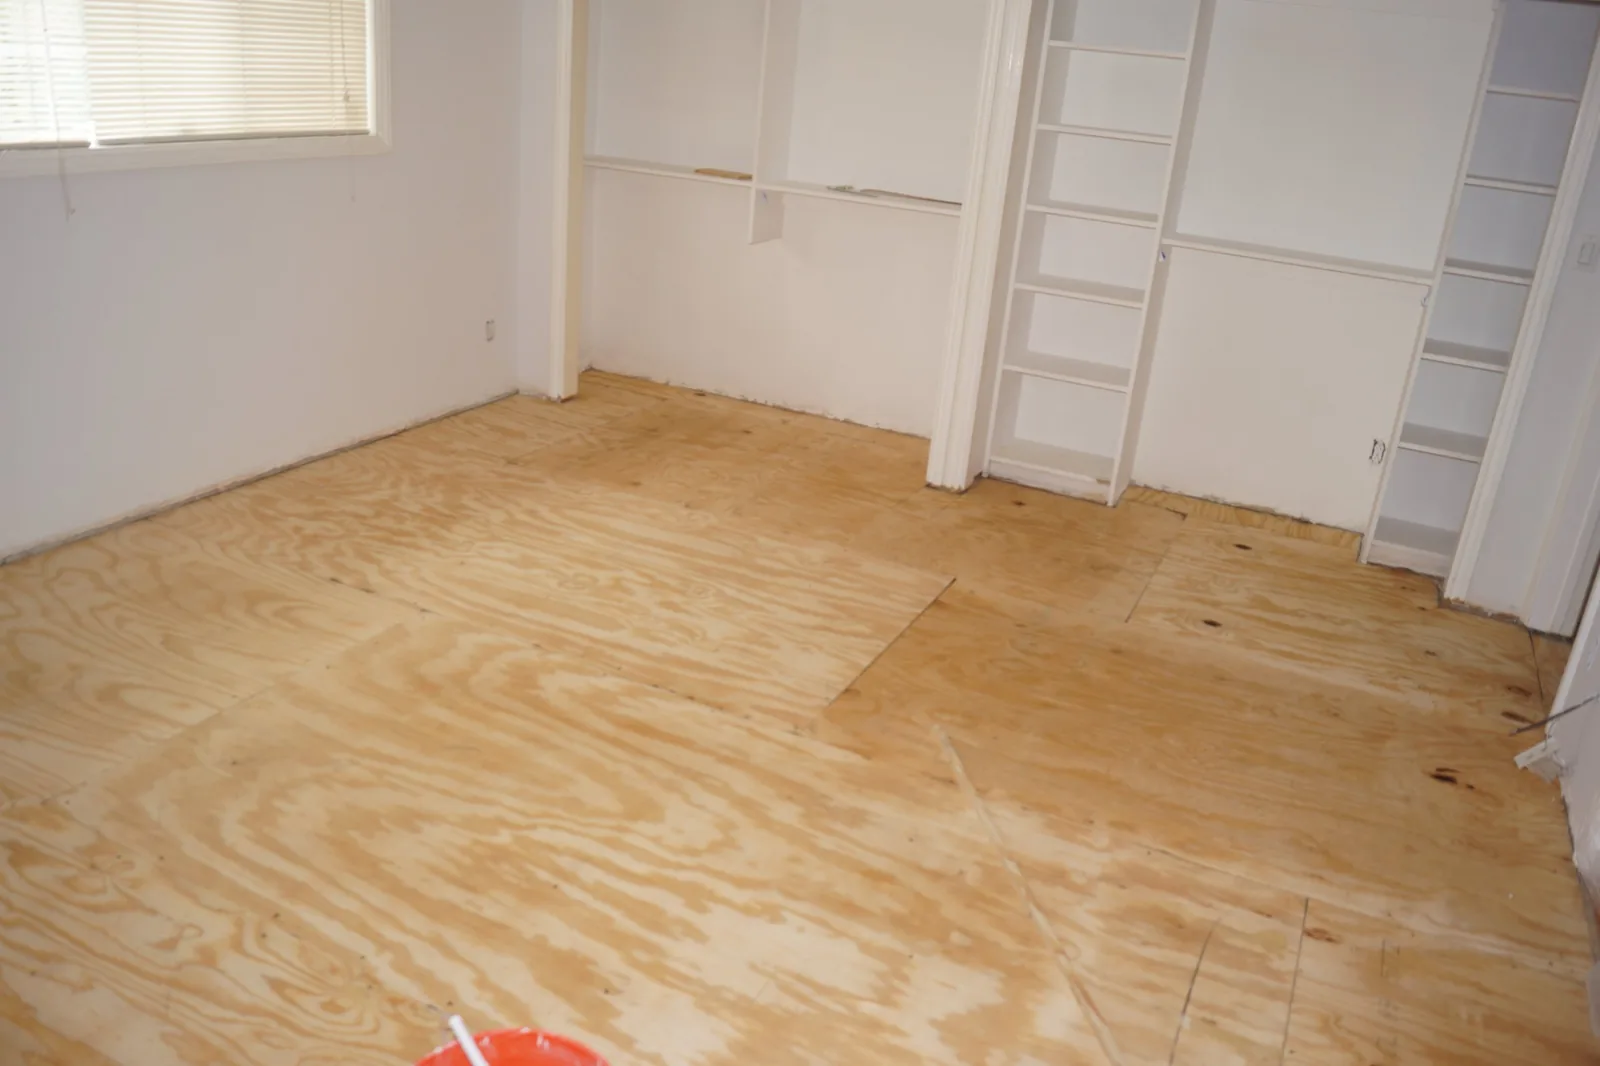
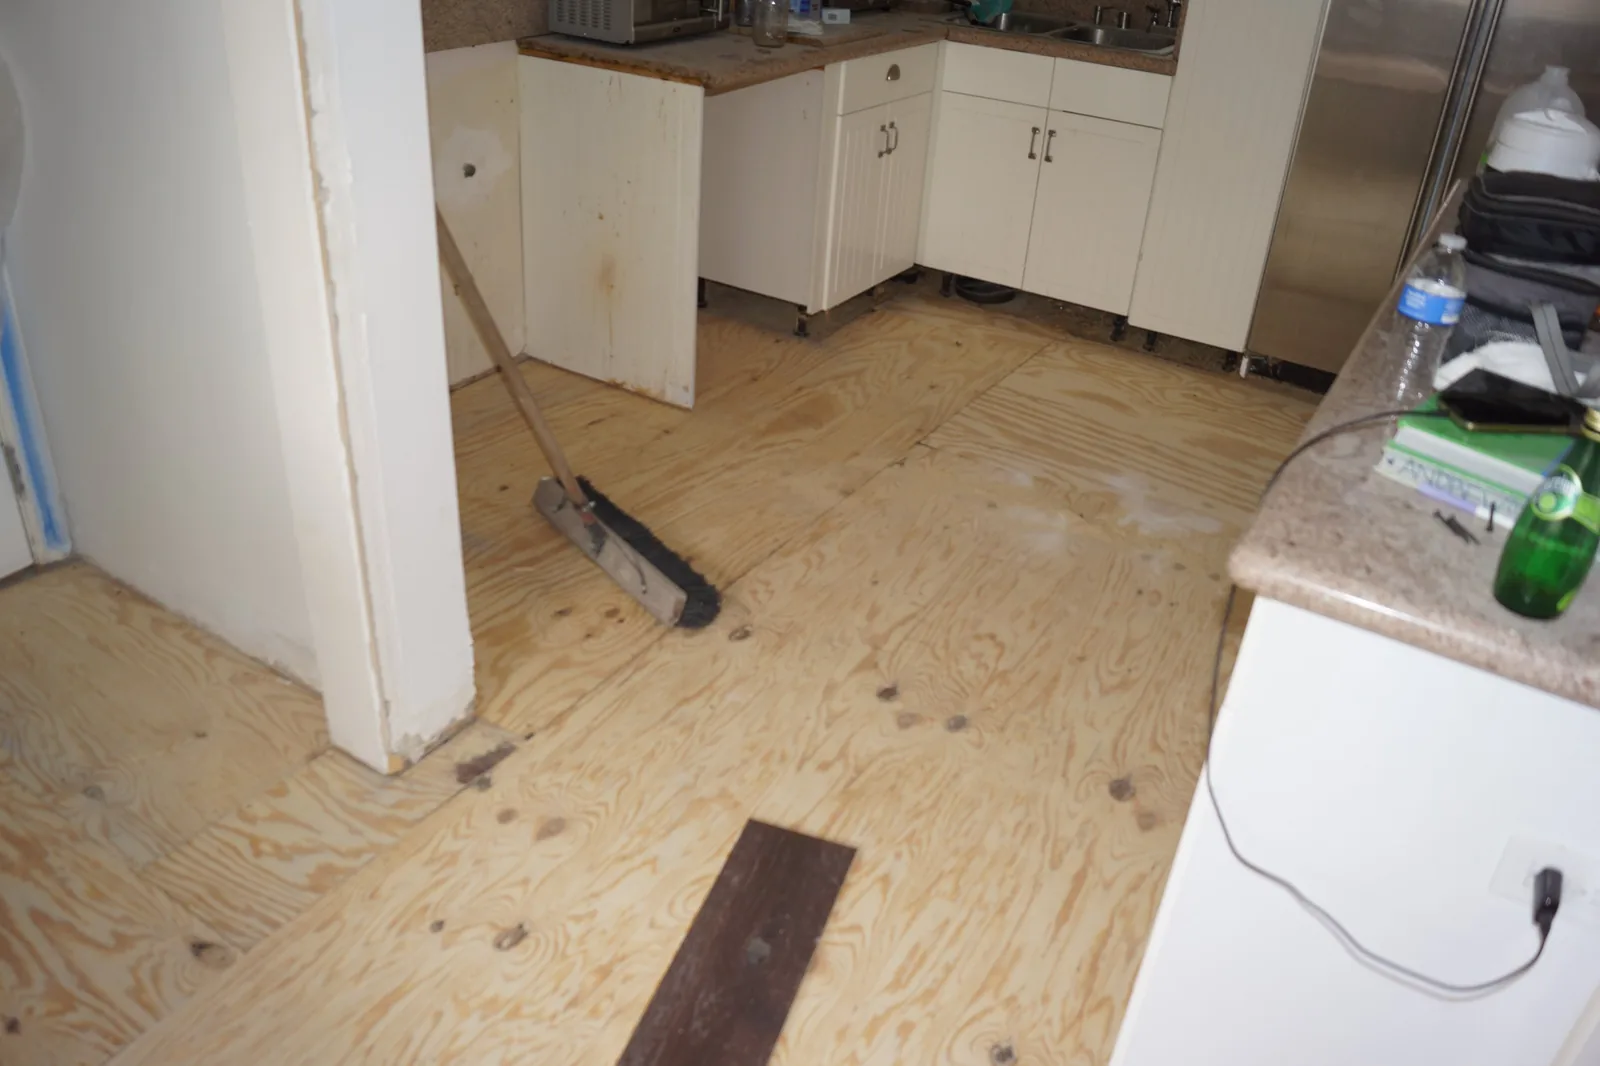
Several rooms in this home were down to plywood. A hardwood floor is only as stable as what it sits on, so plywood is typically checked for loose or moving panels, fasteners that stand proud of the surface, damaged sections and surface irregularities, and then cleaned of debris. In the kitchen photo, the subfloor has been swept clean, with a plank of the new flooring laid out on it.
Exactly what a plywood subfloor needs depends on the flooring product and the installation method the manufacturer approves. That is why we evaluate it at the estimate rather than assume. More on floor removal and subfloor preparation.
Step 3: correcting uneven areas with floor-leveling compound
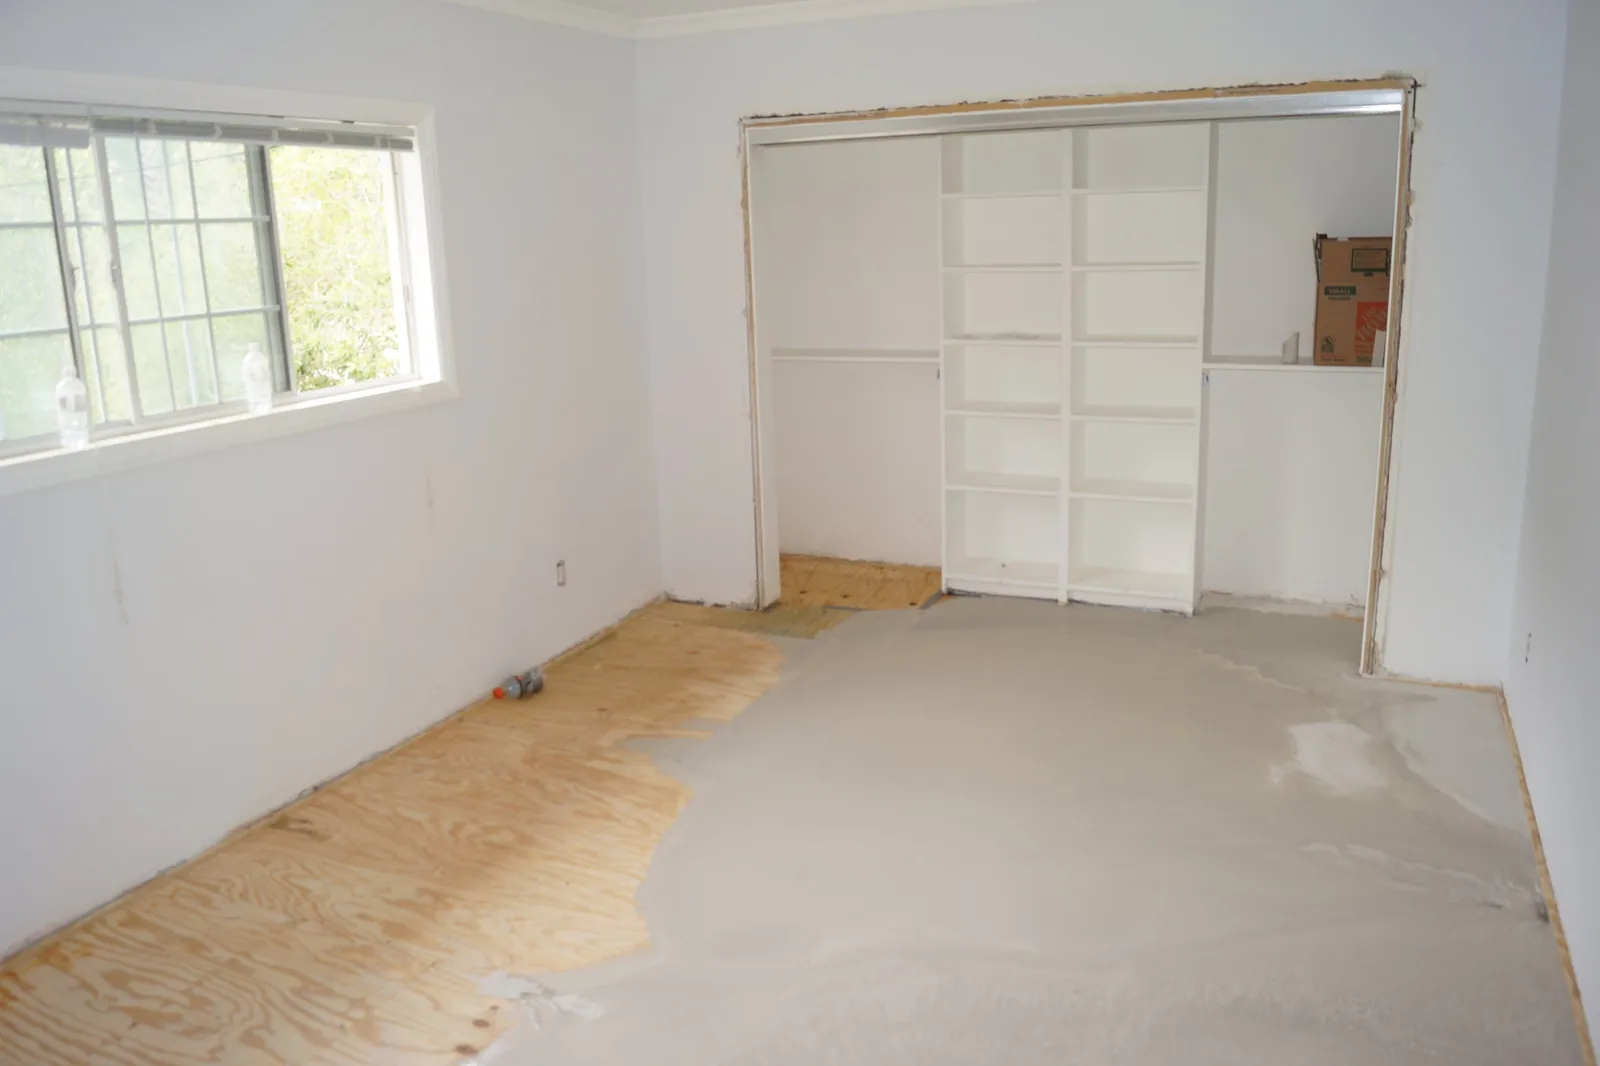
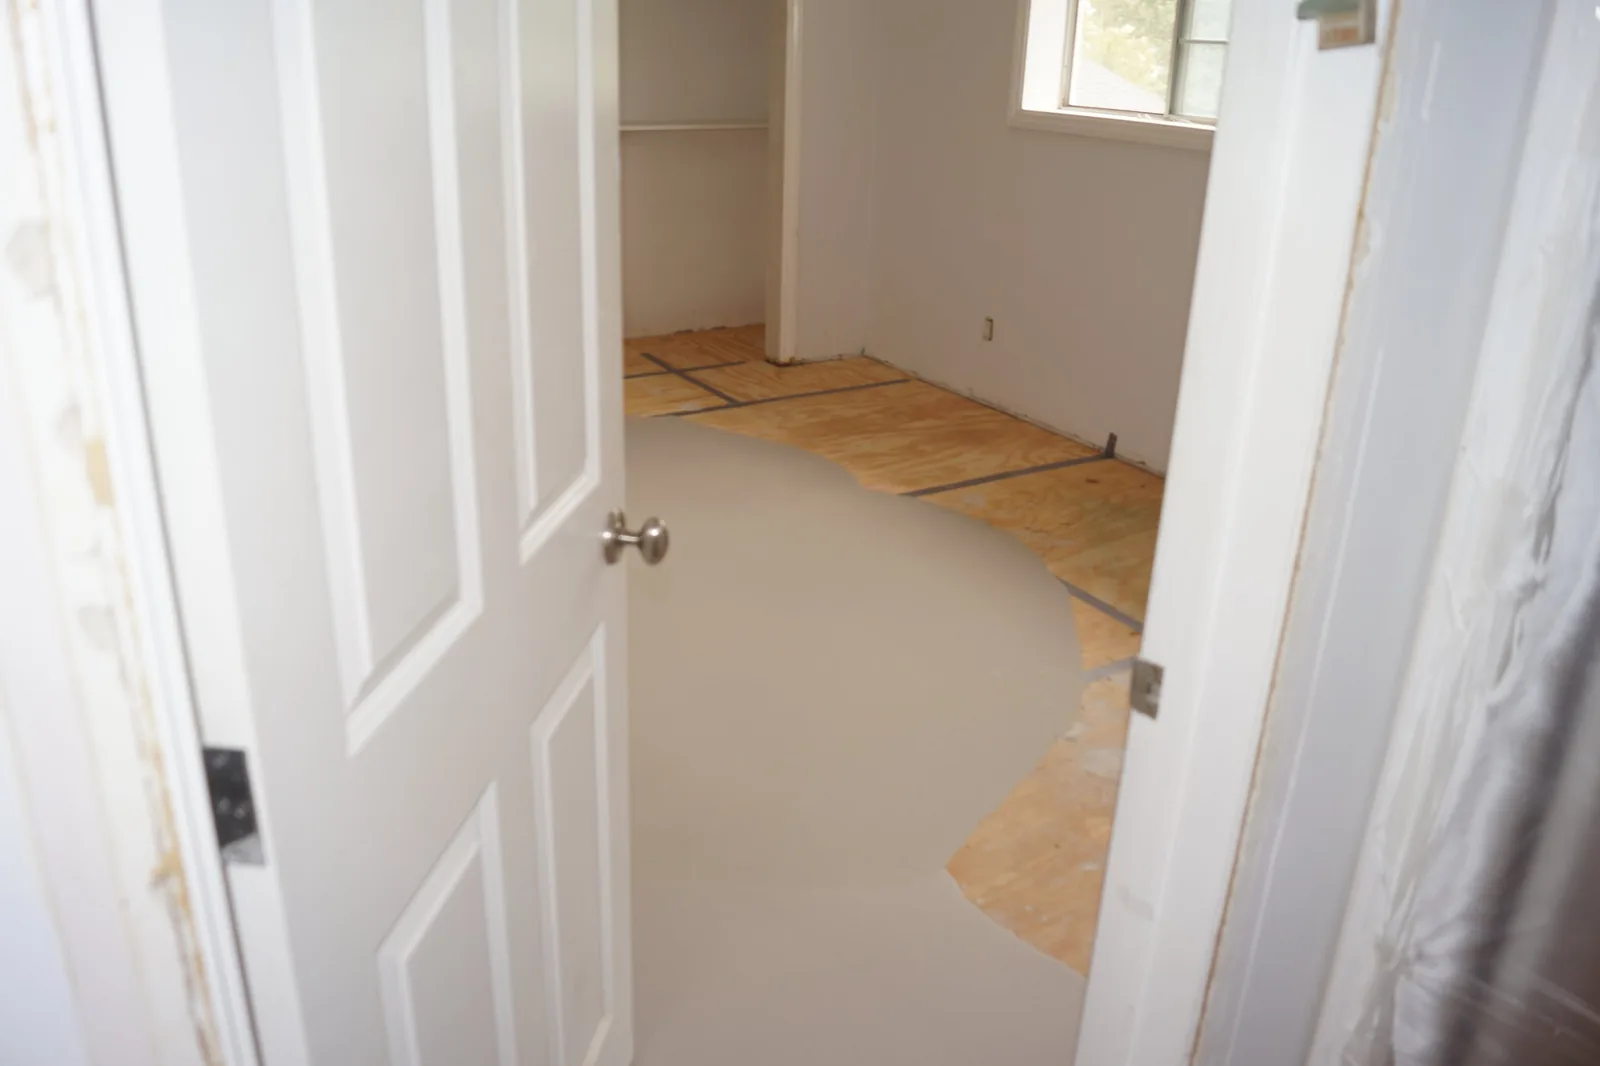
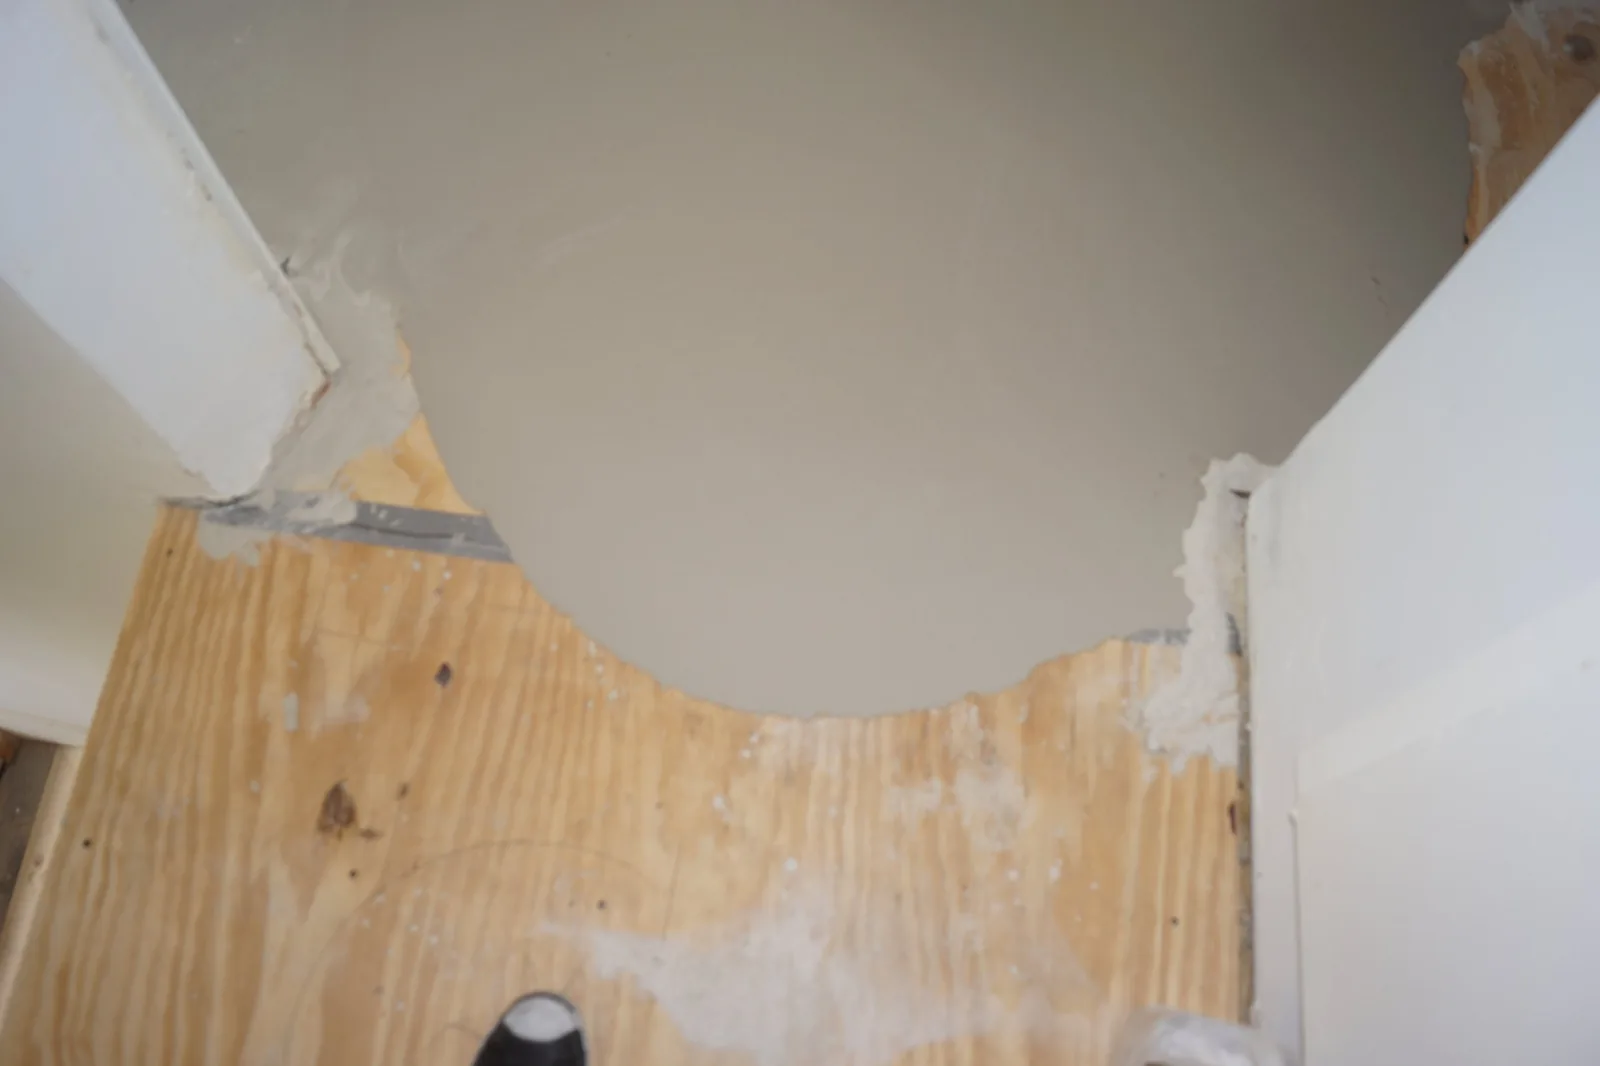
Uneven subfloors cause problems for hardwood: planks can rock or flex over low spots, seams can open, and boards may not sit tight to each other. On this project, low areas were filled with self-leveling compound while higher plywood was left exposed, which you can see where the gray compound gives way to bare wood. Plywood seams were taped where the compound meets them.
Leveling compounds are not a universal fix. The product has to be chosen and applied according to its manufacturer's requirements. Not every self-leveling underlayment is suitable directly over plywood; some systems require a specific primer, reinforcement such as lath, a minimum thickness, or other preparation, and every one has drying or curing times before flooring can go over it. The leveler also has to be compatible with the hardwood flooring system and its installation method. Done properly, addressing high and low spots before installation helps the new floor go down flat and reduces installation-related problems.
Floor preparation
Step 4: preparing the hardwood materials
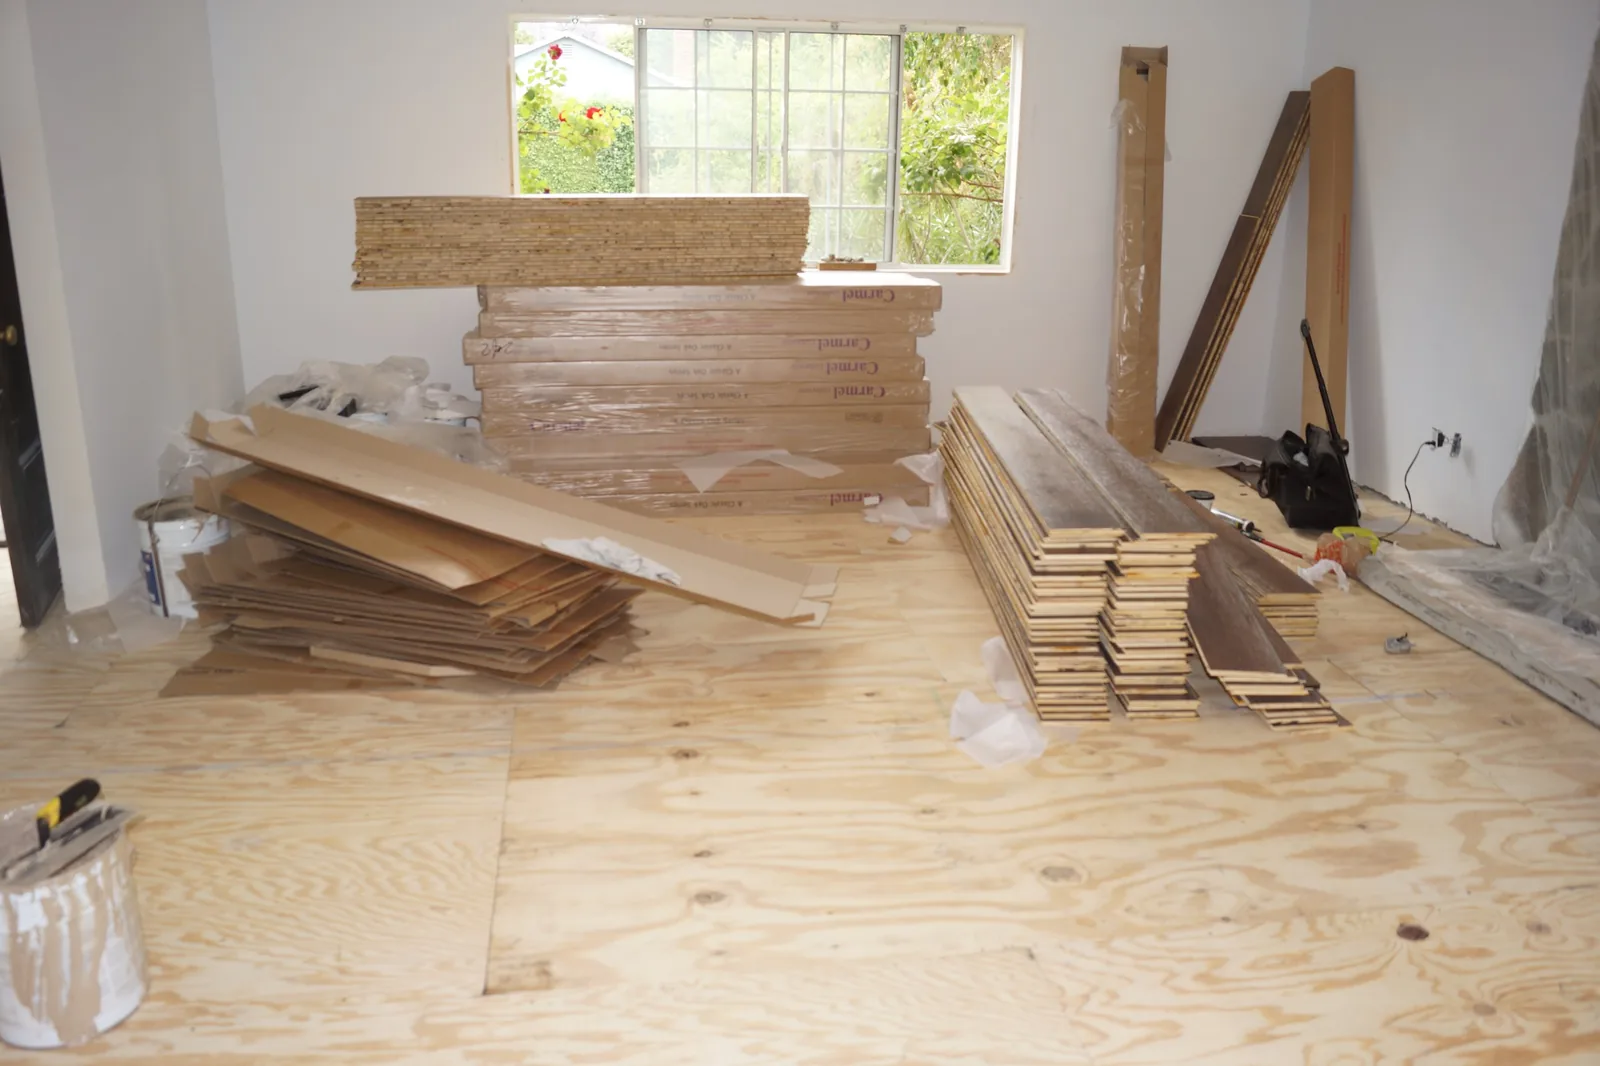
Before installation, the flooring was staged in the home. Typical steps at this point include checking the material's condition, confirming the product specifications, evaluating the jobsite's conditions, testing moisture where the manufacturer requires it, following the manufacturer's acclimation instructions, and planning the layout and transitions. Acclimation requirements differ from product to product, so we follow the instructions for the specific floor rather than a single rule.
Step 5: installing the hardwood flooring
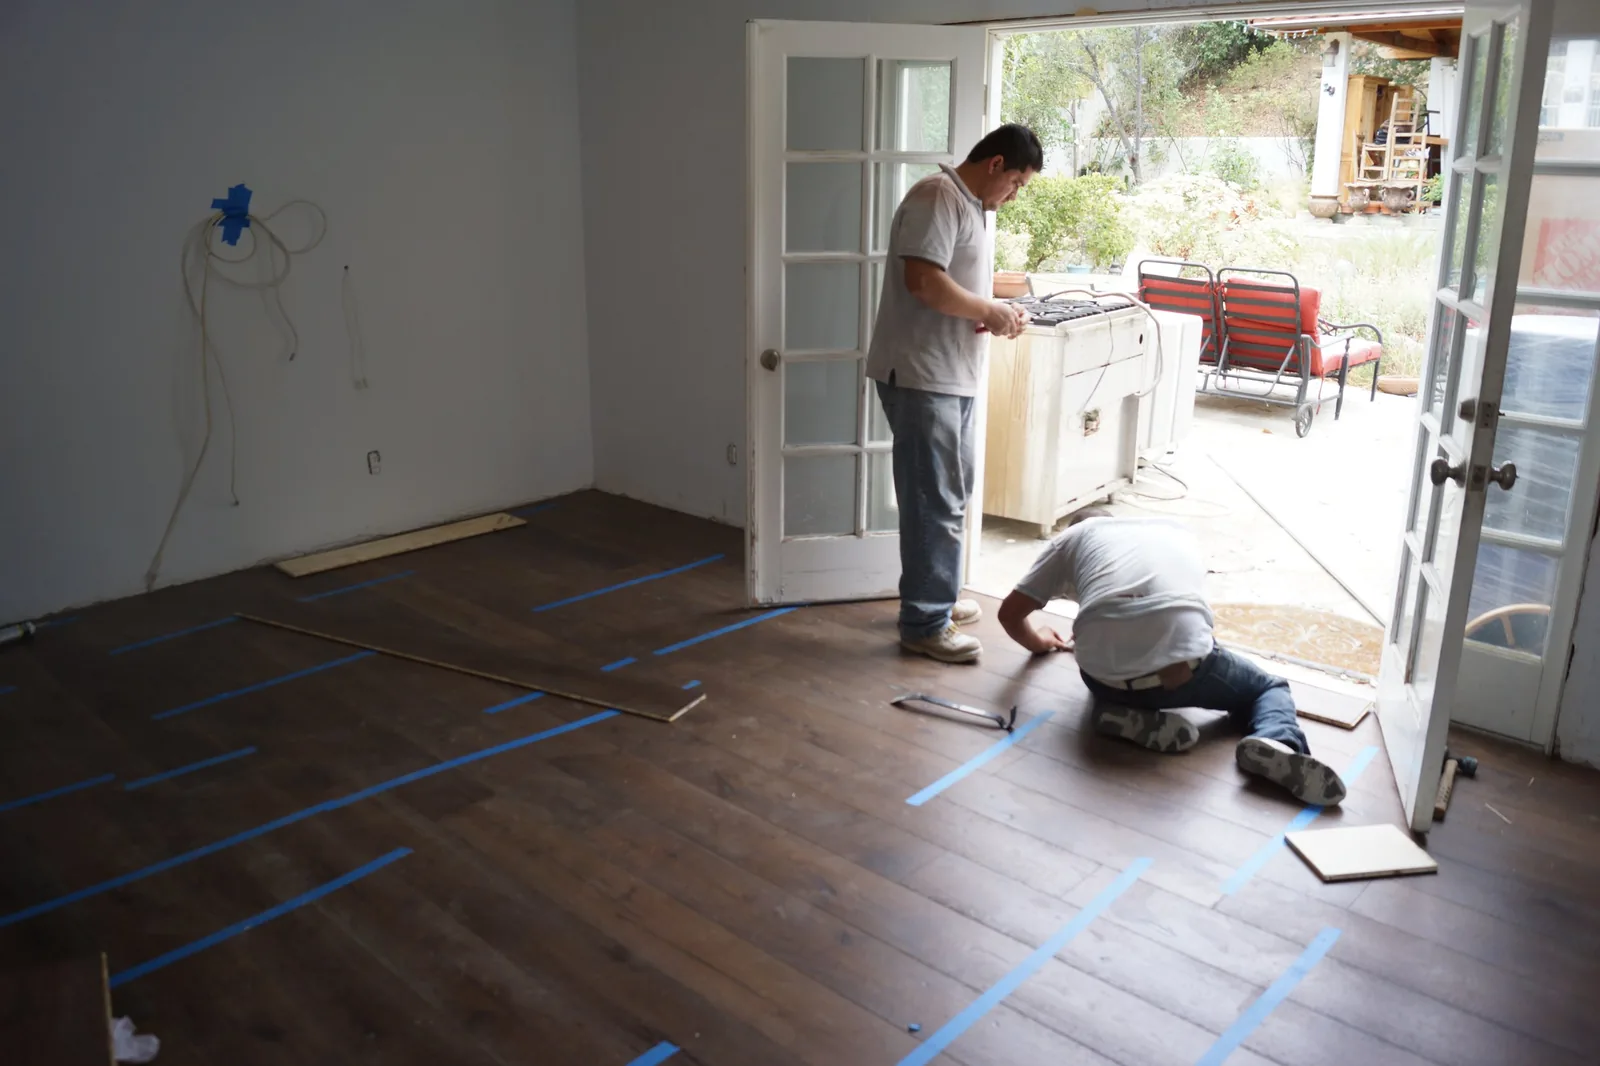
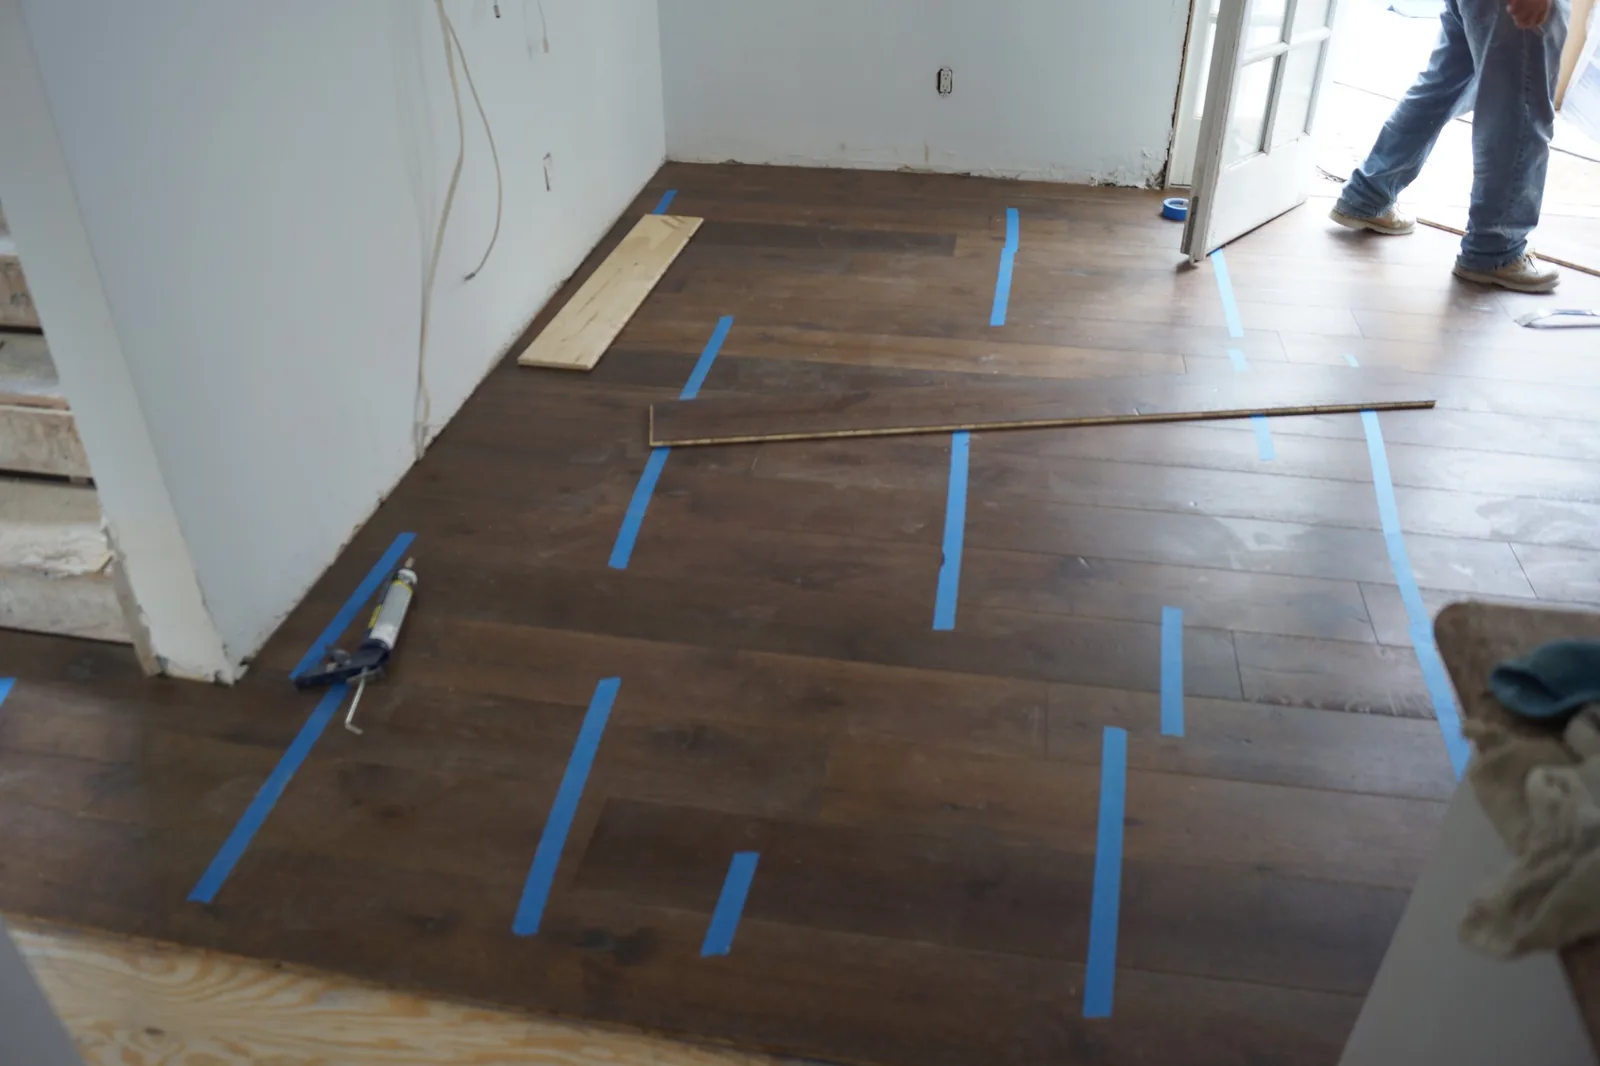
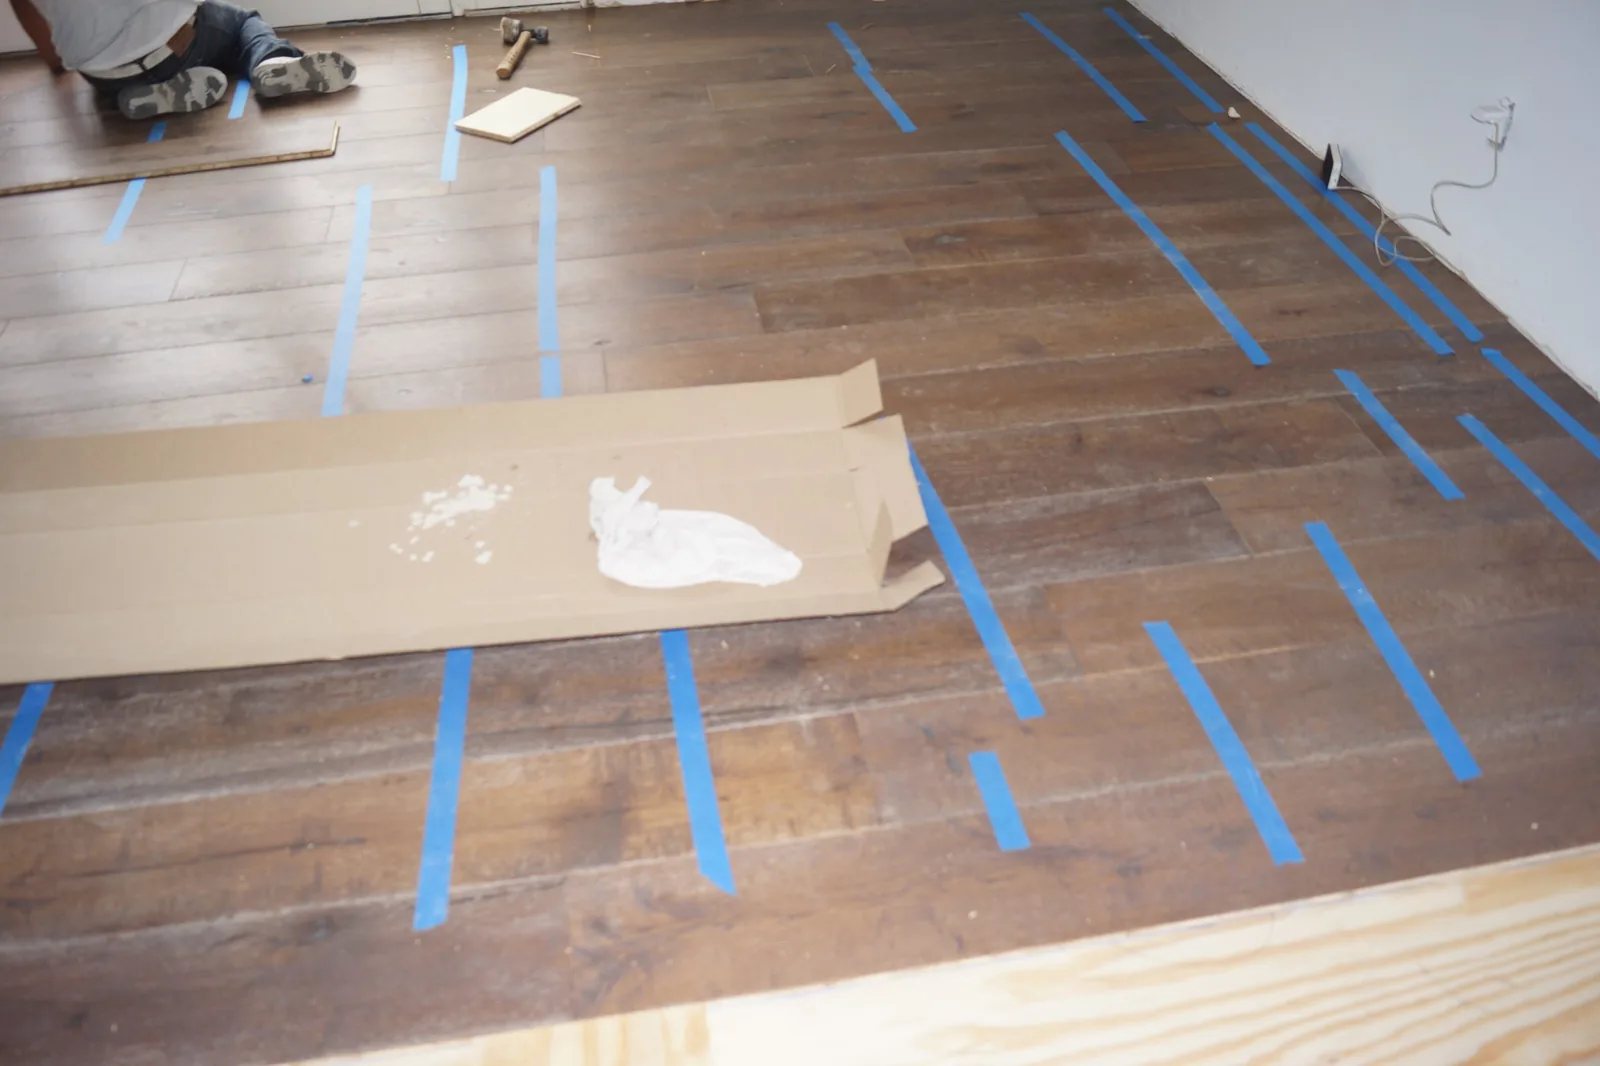
With the subfloor ready, the dark-toned wide planks went down. Good installation comes down to details: a layout planned so boards run with the room's main sightlines, end joints staggered so seams don't line up, appropriate expansion space at walls and doorways, transitions checked as the floor reaches other rooms, and the manufacturer's installation instructions followed throughout.
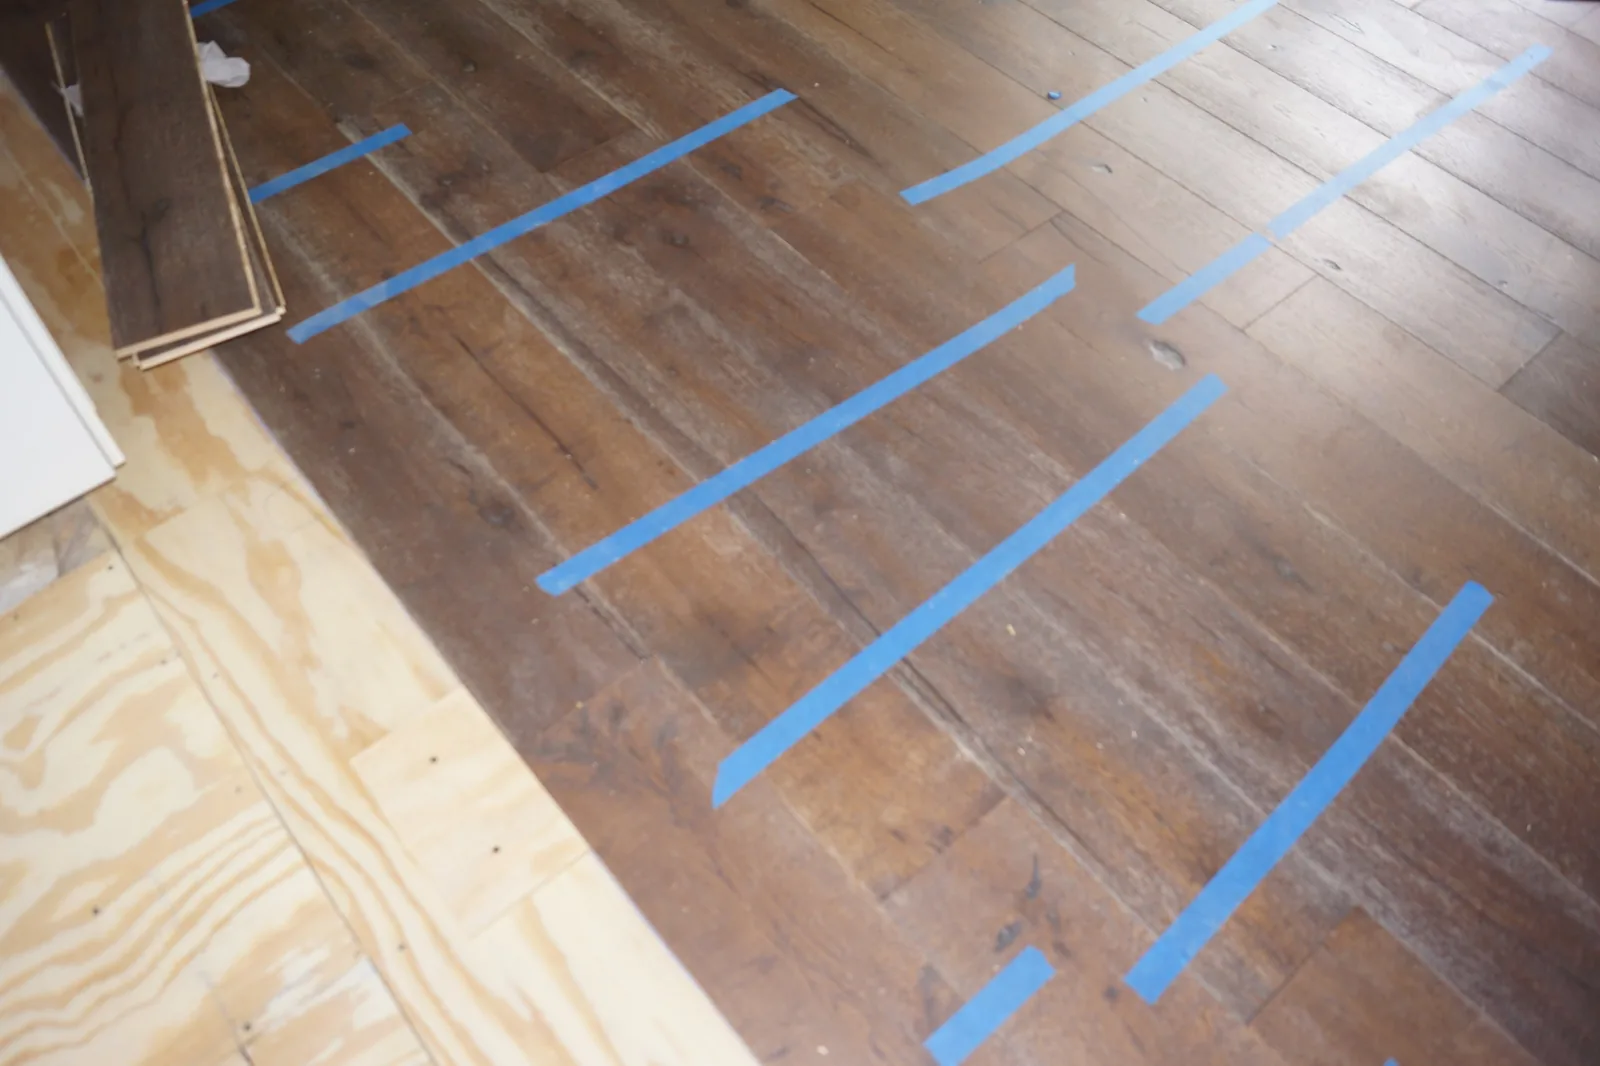
Why do installers put blue tape on hardwood floors?
The blue tape in these photos is temporary. On some installations, installers apply tape across newly laid planks to help keep them aligned and their seams closed while the installation progresses. It is part of the process, not the final appearance of the floor.
- Not every hardwood installation needs tape.
- The tape must be compatible with the flooring's finish.
- It is applied and removed according to the manufacturer's recommendations.
- It helps during installation; it does not replace a proper installation method.
Hardwood installation
The finished floor
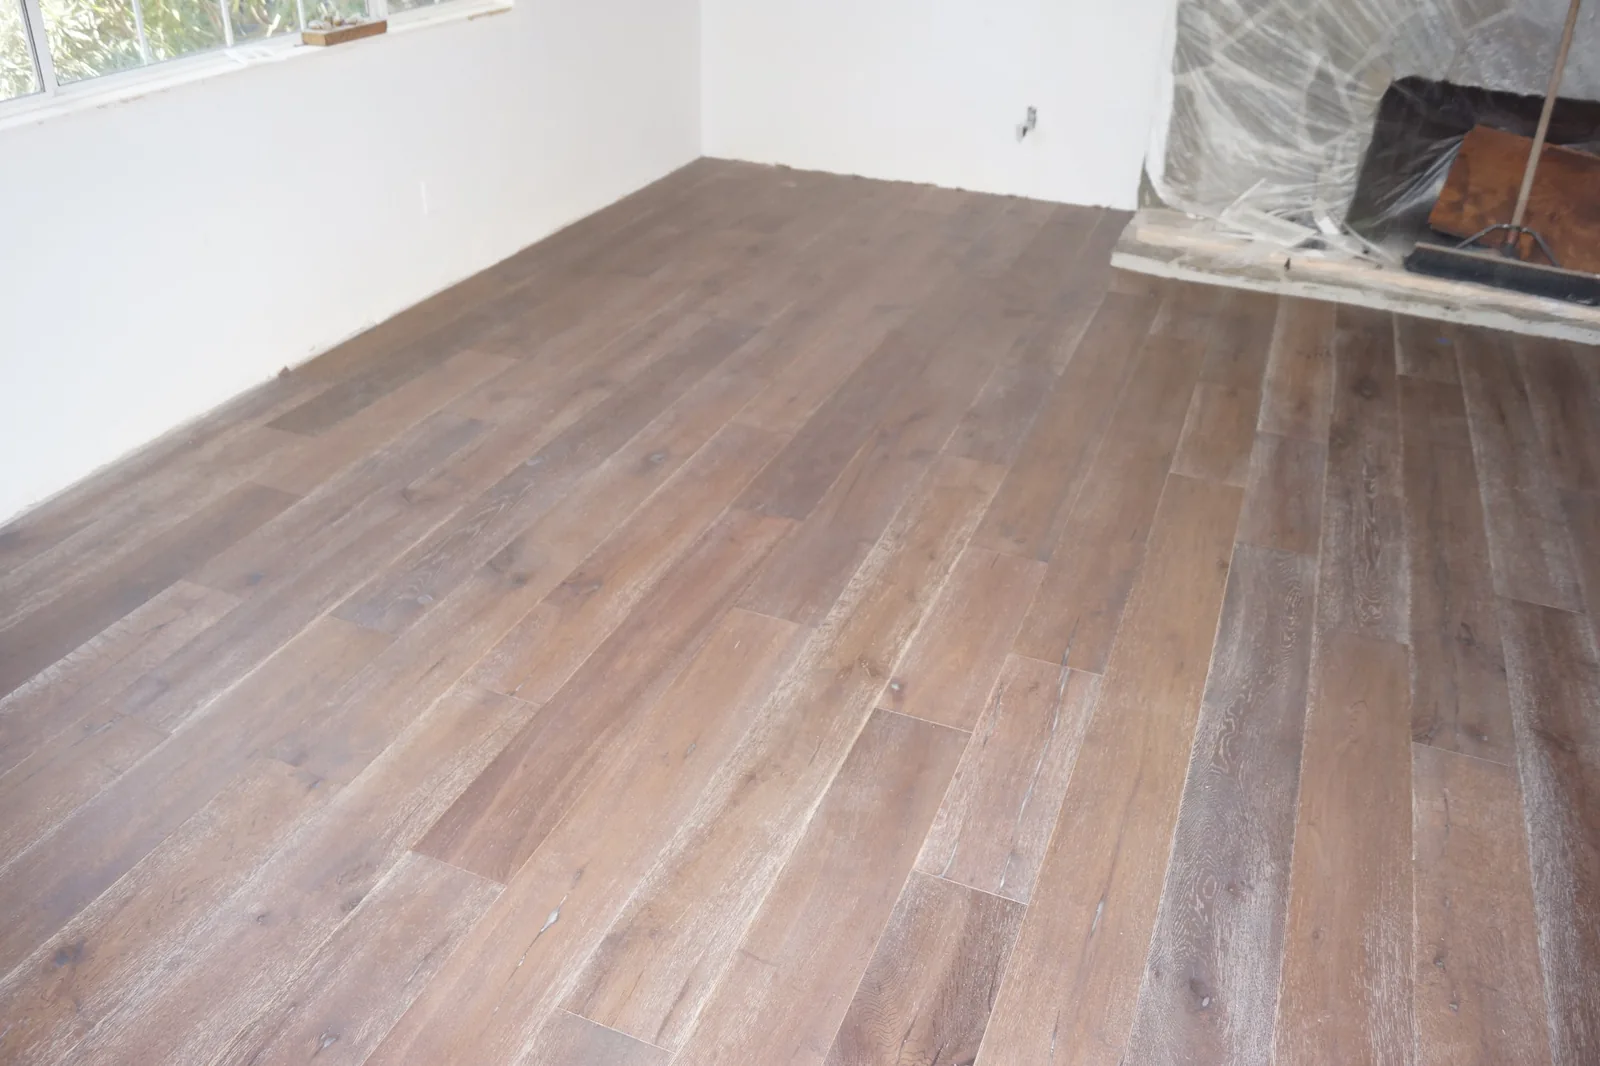
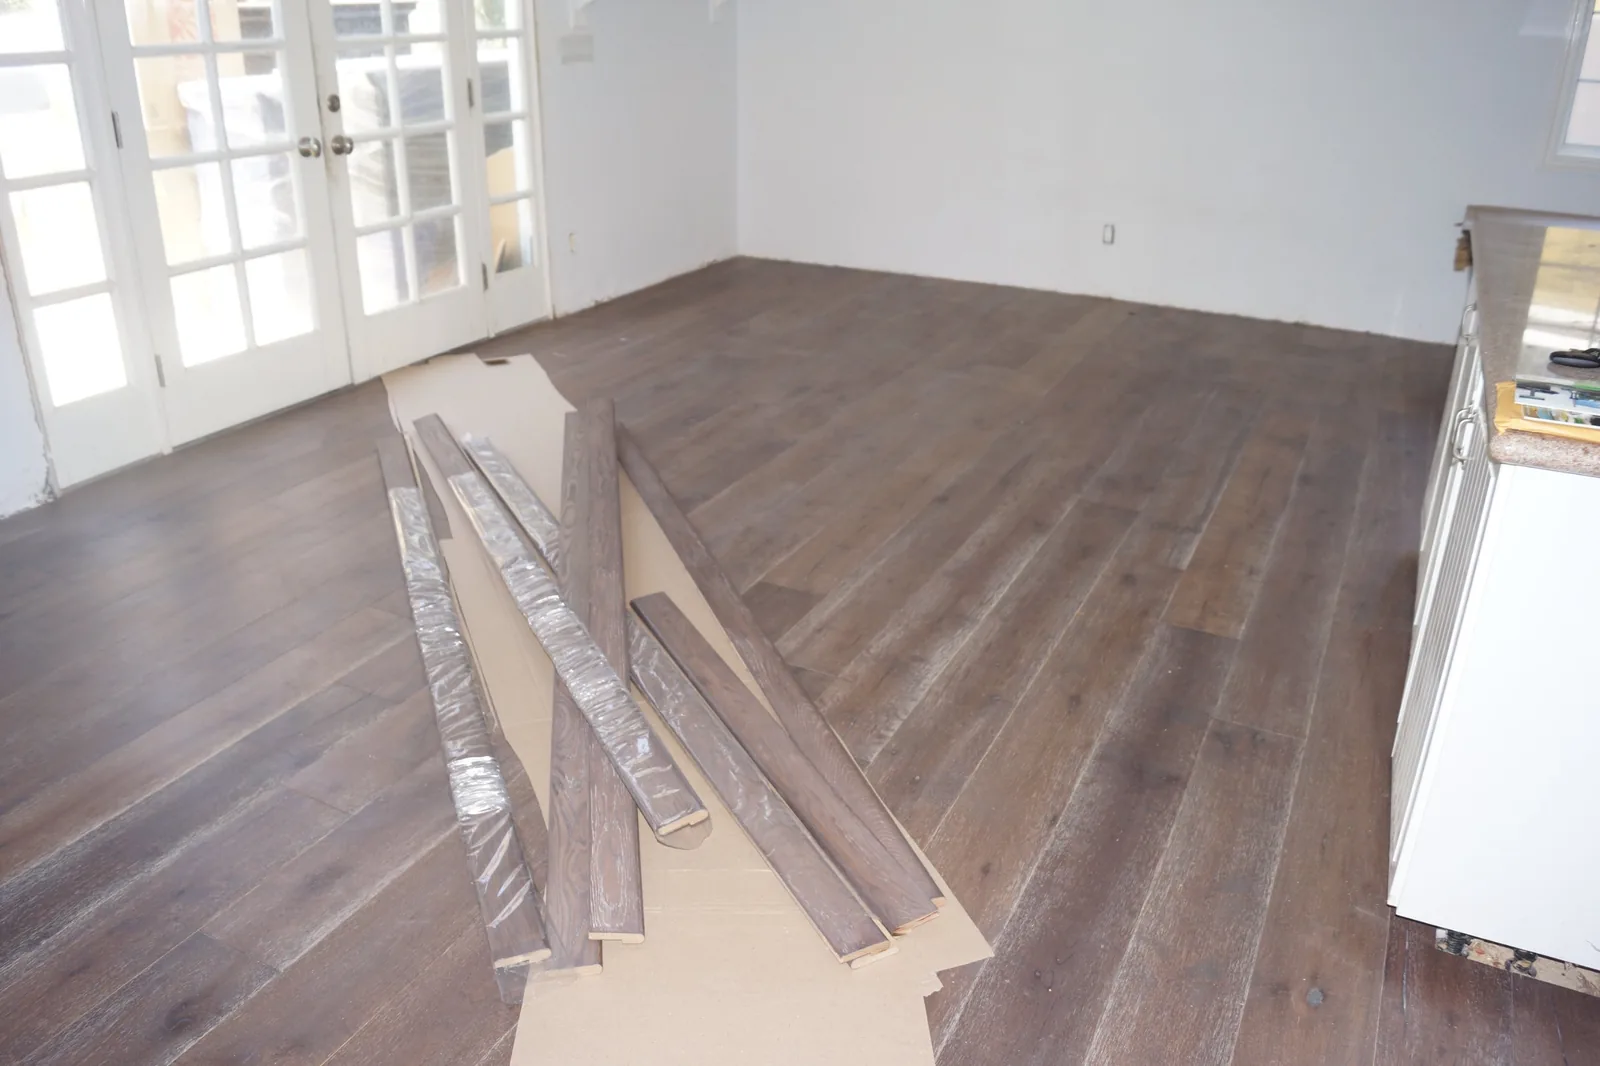
With the tape off, the result is a dark, wide-plank floor with a textured surface, light-highlighted grain and natural character marks running the length of the room. The photos were taken while other work in the house was still underway, so the walls, baseboards and fireplace aren't finished yet, but the floor itself is down. Trim moldings in the same finish were staged on cardboard, ready for the transitions.
Finished floor
Preparing staircases for hardwood flooring
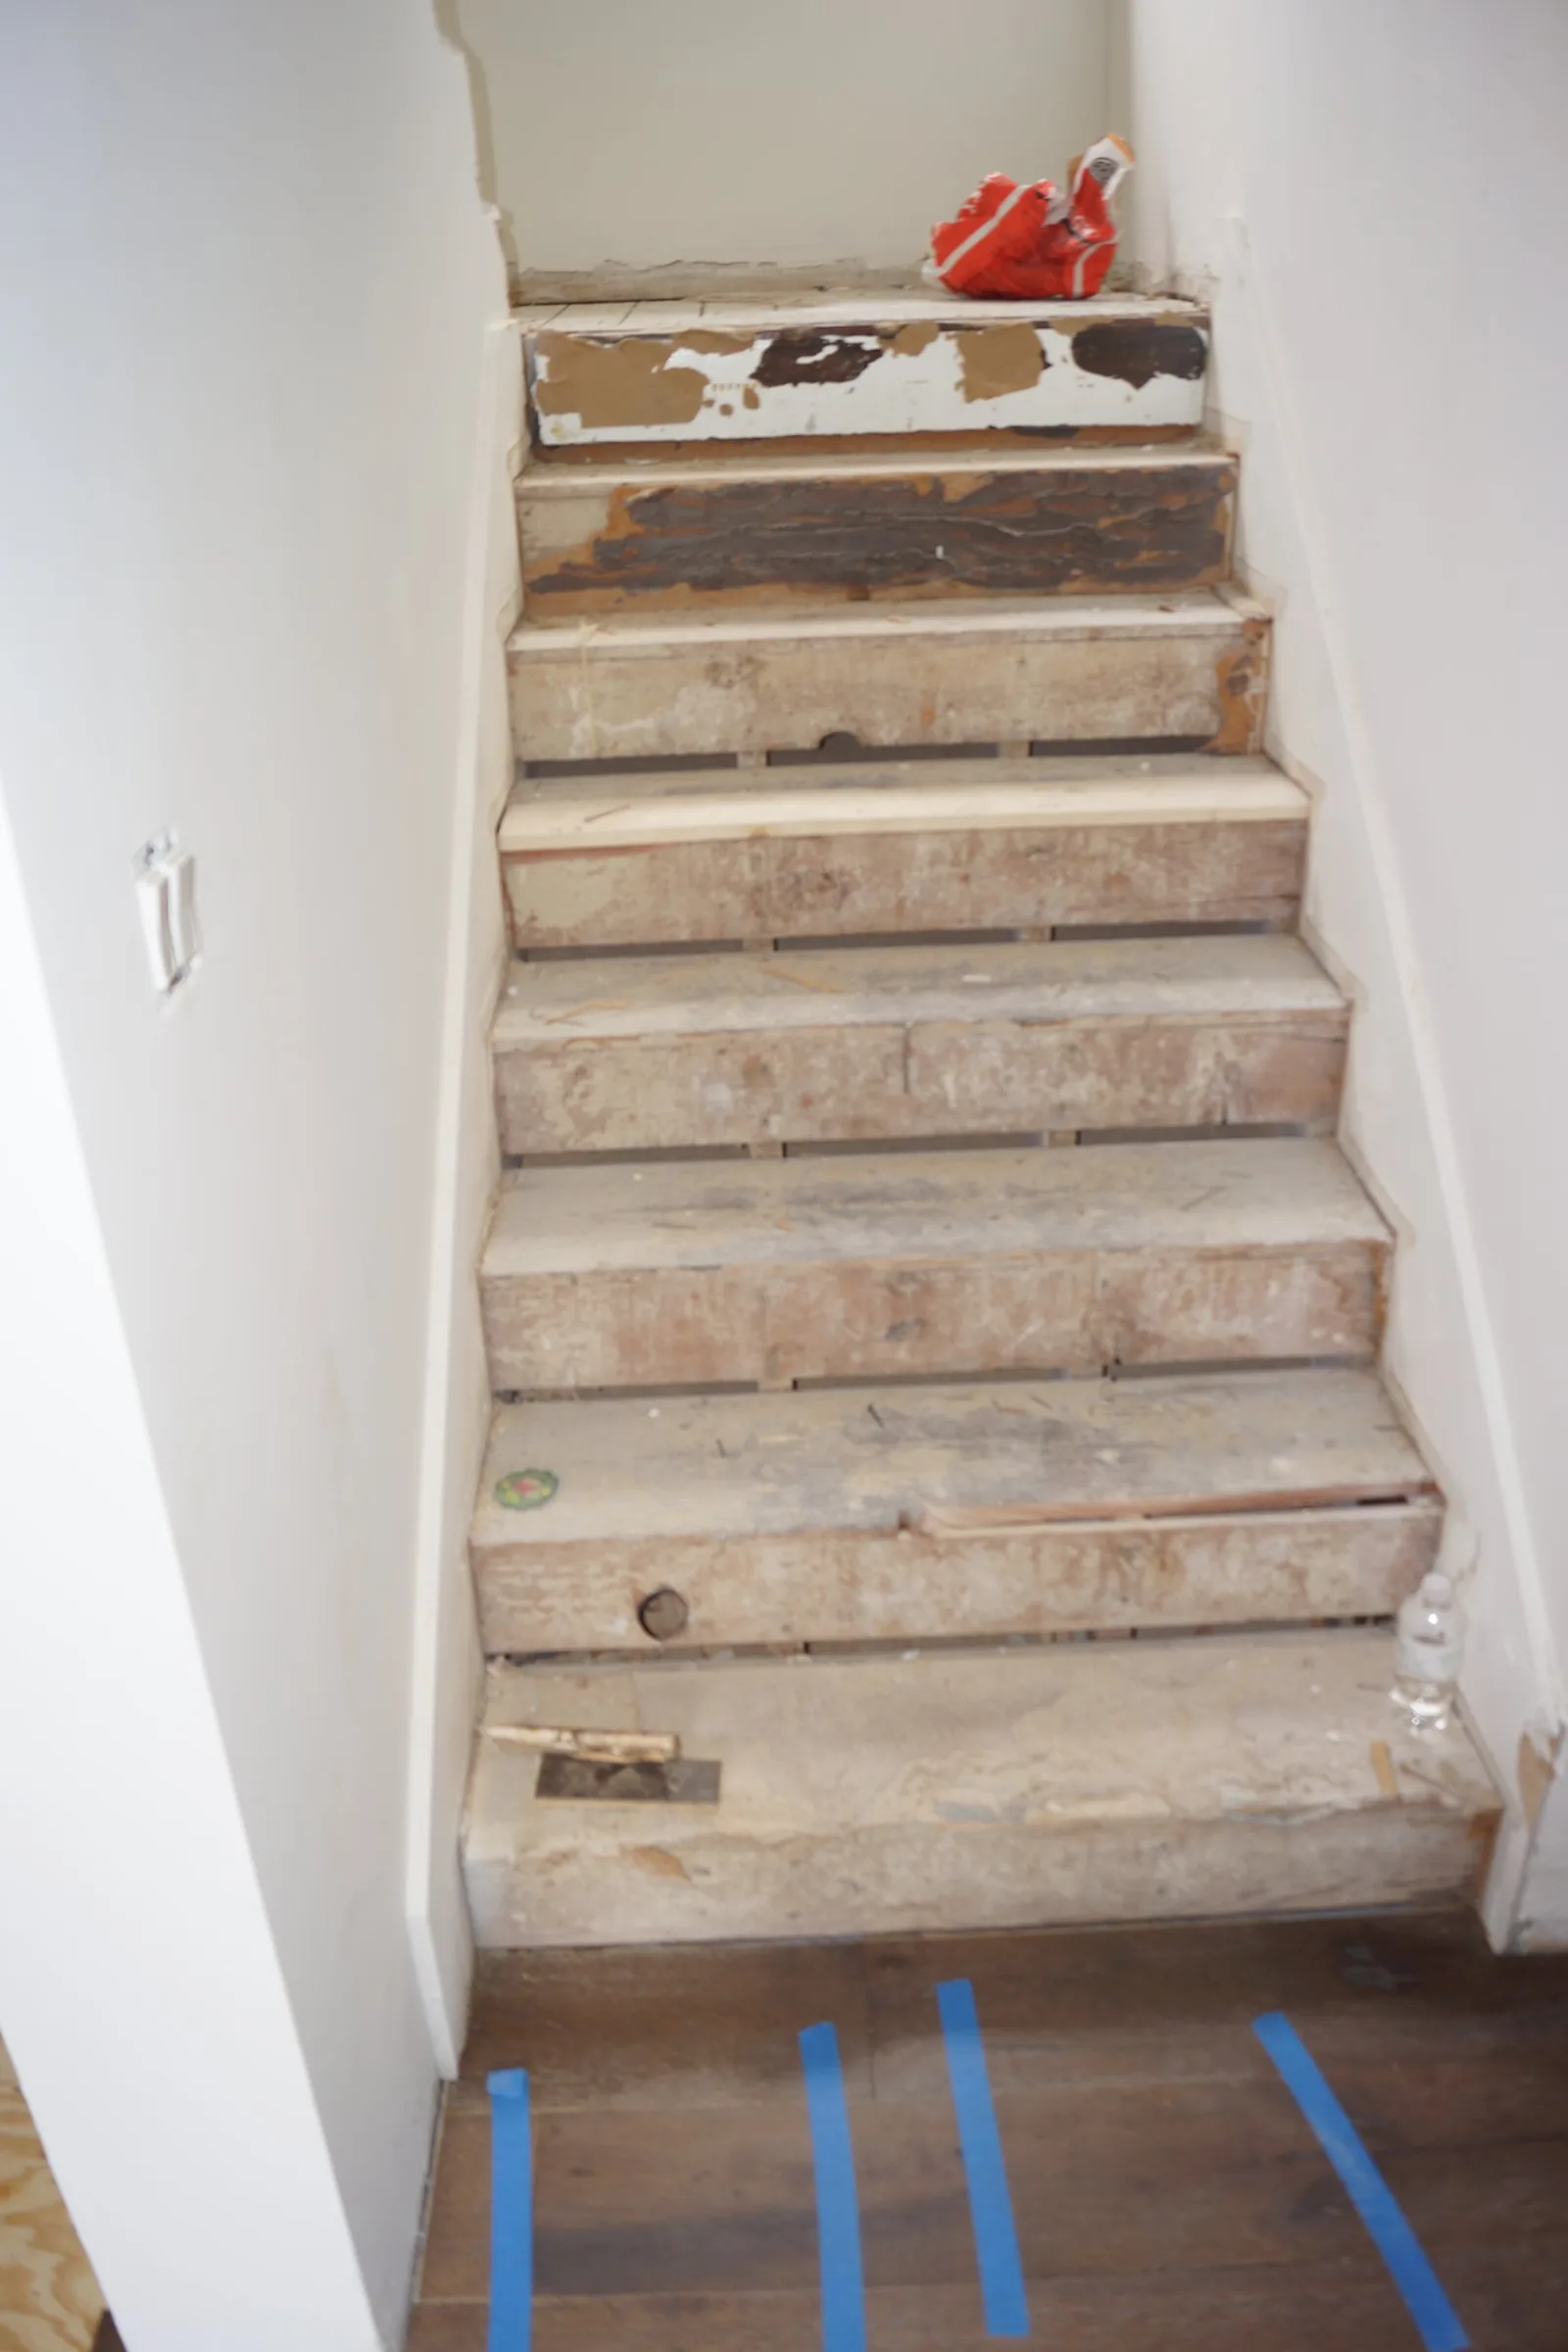
This home's staircase was stripped back to its existing treads and risers during the project, with the new hardwood floor meeting the bottom step. Preparing a staircase for hardwood usually means evaluating the existing treads, risers and nosing, the step dimensions and the structure underneath before choosing how the stairs will be finished.
Los Angeles Hardwoods offers hardwood staircase installation, matching or coordinating stair noses (our flooring collections offer stair-nose solutions, subject to product availability), custom hardwood stair treads, and the transitions between floors and stairs. Those are our general services; the photos here show the staircase during preparation, not its finished state. See our hardwood stair installation service.
Need hardwood floors and stairs planned together?
Why proper preparation matters for long-term performance
Careful preparation gives hardwood proper support, helps planks stay aligned, reduces the risk of movement-related issues, keeps the installation consistent from room to room and keeps the job within the manufacturer's requirements. It doesn't guarantee a floor will never have a problem, but skipping it is one of the most common reasons hardwood floors fail early.
Project specifications
- Location
- Pasadena, California
- Project type
- Residential hardwood flooring installation
- Subfloor
- Plywood
- Preparation
- Subfloor preparation; self-leveling compound where necessary
- Flooring
- Dark-toned wide-plank hardwood
- Installation detail
- Temporary blue tape to help maintain seam alignment
- Stairs
- Existing staircase prepared during the project
Professional hardwood flooring installation in Pasadena, CA
Los Angeles Hardwoods serves homeowners in Pasadena and surrounding Los Angeles communities who want hardwood flooring installed properly, from the subfloor up. We work with engineered hardwood, European white oak and wide-plank floors, along with subfloor preparation, floor leveling and staircase installation. Learn more about our hardwood flooring installation in Pasadena; we also bring samples to nearby foothill homes in Bradbury and San Marino. See our hardwood flooring installation service and how the in-home estimate works. See more projects in our work.
Questions about hardwood floor preparation
Do floors need to be perfectly level before installing hardwood?+
No. What matters most is flatness: how much the surface rises and dips over a set distance. Manufacturers publish flatness tolerances, commonly around 3/16 inch within 10 feet or 1/8 inch within 6 feet for wood, and some products are stricter. A floor can be slightly out of level and still be within tolerance.
Can engineered hardwood be installed over plywood?+
Often, yes. Plywood is a common substrate for engineered hardwood, but whether it works depends on the product's requirements, the plywood's condition and thickness, and the installation method the manufacturer approves.
What happens if my subfloor is uneven?+
It is evaluated first. High spots may be sanded or ground, loose panels re-fastened, damaged sections replaced, and low areas filled with a patch or a leveling compound that is compatible with the substrate and the flooring system.
Why do hardwood installers use blue tape?+
On some installations, temporary tape helps keep planks aligned and seams closed while work continues. It must be compatible with the floor's finish and is removed as the manufacturer recommends. It does not replace a proper installation method.
Can hardwood flooring be installed on stairs?+
Yes. Stairs are usually finished with hardwood treads, risers and stair noses. Our flooring collections offer matching or coordinating stair-nose solutions, subject to product availability, and we can provide custom hardwood stair treads.